
6 - Silicone molds
Supplies:
- Silicone mold set
- Silicone spatula set

- Measuring cup
- Stirring paddle
- Support mold
- Mother form
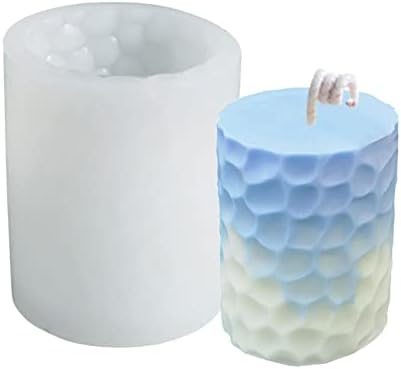
Making your own silicone molds is simple and practical. You can create unique candles. Silicone molds are not only durable but also easy to create complex candles thanks to their flexibility.
Making silicone molds - casting
To make a silicone mold, you first need a "master mold." The master mold will ultimately determine the thickness of the mold and is therefore very important for the final result. Make sure the silicone mold is at least 1 cm thick on all sides. This will give the mold sufficient strength and durability. Silicone rubber
provides an exact copy of the master model, displaying every detail.
1. Take a measuring cup/jug and a good mixing spoon. Mix the silicone rubber with the hardener at a ratio of about 1 to 10. Mix gently and evenly to avoid air bubbles.
2. When a homogeneous mass has formed, you can gently pour the mixture over the master model in the support model.
3. The silicone rubber can be used a few minutes after mixing and will then begin to harden. For best results, allow the rubber to cure for at least 24 hours.
4. Then remove the silicone mold from the support mold and remove the master model. The mold is now ready for use!
For the advanced user, it is also possible to make separable silicone molds for slightly more complex shapes.
Add less hardener to the rubber for a more flexible mold. Use more hardener for a stiffer, firmer mold.
Silicone molds using spatulas
Silicone molds can also be made using the spatula technique. The spatula technique is more commonly used for larger candles.
To make a silicone mold using a spatula, you'll need silicone rubber, hardener, and Thixo. Add the hardener to the silicone rubber at a ratio of 2 parts to 100 (2%).
2. Then add 0.5 to 1% Thixo to this mixture. Stir the ingredients well until a homogeneous mass is formed. If bubbles form, let the mixture rest for about 5 minutes.
3. Next, use a spatula to apply the mixture to the master mold. Ensure the layer is applied approximately 1 cm around the master mold.
4. Let the mixture harden for about 24 hours at room temperature (approximately 18°C). Then carefully cut open the mold with a sharp knife.
Important:
- Cover the work surface and wear an apron!
- When pouring, make sure the pot is level and on a firm surface.
- Prepare only as much color as you need.
- Check the temperature of the wax with a thermometer.
Warning:
- Only light candles in the presence of adults.
- Beware of fire: never heat the wax directly in the mould.
- Never heat the wax directly in a pan or over an open fire.
- The wax vapour is flammable at 180°C.
- Never leave candles burning unattended.
- Always place candles on a fireproof surface. (See our safety instructions .)

1 comment
Het vinden van originele siliconen mallen is niet eenvoudig. Dankzij de 1 op 1 workshop bij Geert kan ik mijn eigen mallen maken. Trouwens hun siliconen product heb ik nergens elders goedkoper gevonden. Thx